Существует несколько способов использования и расширения системы IMGUI в соответствии с вашими потребностями. Элементы управления можно смешивать и создавать, и у вас есть много возможностей указать, как будет обрабатываться ввод данных пользователем в графическом интерфейсе.
Составные элементы управления
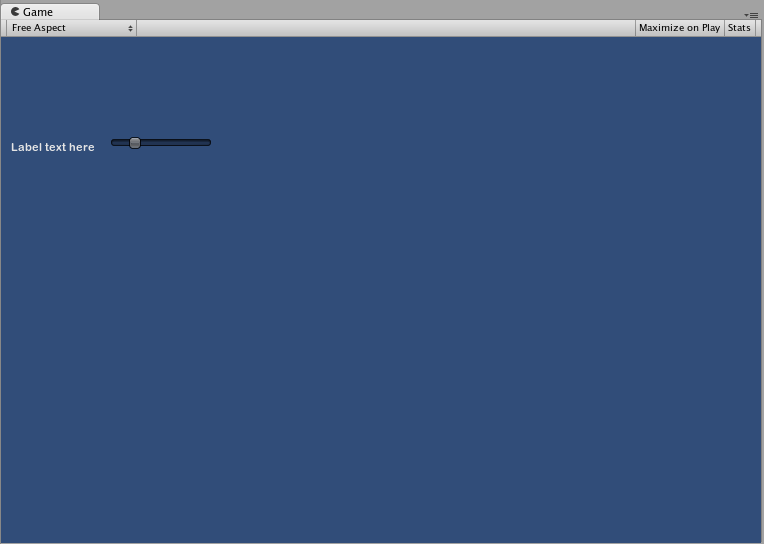
В вашем графическом интерфейсе могут возникнуть ситуации, когда два типа элементов управления всегда отображаются вместе. Например, возможно, вы создаете экран создания персонажа с несколькими горизонтальными ползунками. Всем этим ползункам нужна метка, чтобы идентифицировать их, чтобы игрок знал, что они настраивают. В этом случае вы можете объединить каждый вызов GUI.Label() с вызовом GUI.HorizontalSlider() или создать составной элемент управления который включает в себя и метку, и ползунок вместе.
/* Label and Slider Compound Control */

// JavaScript
var mySlider : float = 1.0;

function OnGUI () {
    mySlider = LabelSlider (Rect (10, 100, 100, 20), mySlider, 5.0, "Label text here");
}

function LabelSlider (screenRect : Rect, sliderValue : float, sliderMaxValue : float, labelText : String) : float {
    GUI.Label (screenRect, labelText);
    screenRect.x += screenRect.width; // <- Push the Slider to the end of the Label
    sliderValue = GUI.HorizontalSlider (screenRect, sliderValue, 0.0, sliderMaxValue);
    return sliderValue;
}


// C#
using UnityEngine;
using System.Collections;

public class GUITest : MonoBehaviour {

    private float mySlider = 1.0f;

    void OnGUI () {
        mySlider = LabelSlider (new Rect (10, 100, 100, 20), mySlider, 5.0f, "Label text here");
    }

    float LabelSlider (Rect screenRect, float sliderValue, float sliderMaxValue, string labelText) {
        GUI.Label (screenRect, labelText);

        // <- Push the Slider to the end of the Label
        screenRect.x += screenRect.width;

        sliderValue = GUI.HorizontalSlider (screenRect, sliderValue, 0.0f, sliderMaxValue);
        return sliderValue;
    }

}
В этом примере вызов LabelSlider() и передача правильных аргументов предоставит метку в паре с горизонтальным ползунком. При написании составных элементов управления вы должны не забывать возвращать правильное значение в конце функции, чтобы сделать ее интерактивной.

Статические составные элементы управления
Используя Статические функции, вы можете создать целую коллекцию собственных составных элементов управления, которые являются автономными. Таким образом, вам не нужно объявлять свою функцию в том же скрипте, в котором вы хотите ее использовать.
/* This script is called CompoundControls */

// JavaScript
static function LabelSlider (screenRect : Rect, sliderValue : float, sliderMaxValue : float, labelText : String) : float {
    GUI.Label (screenRect, labelText);
    screenRect.x += screenRect.width; // <- Push the Slider to the end of the Label
    sliderValue = GUI.HorizontalSlider (screenRect, sliderValue, 0.0, sliderMaxValue);
    return sliderValue;
}


// C#
using UnityEngine;
using System.Collections;

public class CompoundControls : MonoBehaviour {

    public static float LabelSlider (Rect screenRect, float sliderValue, float sliderMaxValue, string labelText) {
        GUI.Label (screenRect, labelText);

        // <- Push the Slider to the end of the Label
        screenRect.x += screenRect.width;

        sliderValue = GUI.HorizontalSlider (screenRect, sliderValue, 0.0f, sliderMaxValue);
        return sliderValue;
    }

}
Сохранив приведенный выше пример в скрипте с именем CompoundControls, вы сможете вызывать функцию LabelSlider() из любого другого скрипта, просто набрав CompoundControls.LabelSlider( ) и предоставить свои аргументы.
Усовершенствованные составные элементы управления
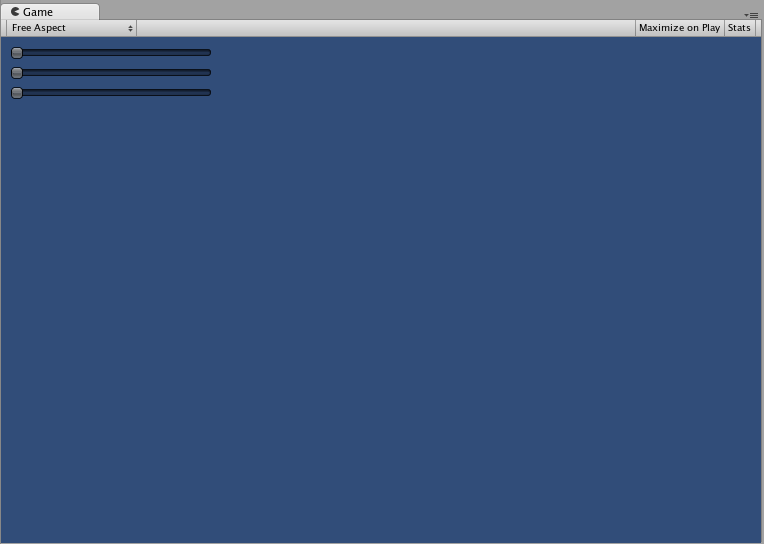
Вы можете проявить творческий подход с составными элементами управления. Их можно расположить и сгруппировать как угодно. В следующем примере создается повторно используемый ползунок RGB.
/* RGB Slider Compound Control */

// JavaScript
var myColor : Color;

function OnGUI () {
    myColor = RGBSlider (Rect (10,10,200,10), myColor);
}

function RGBSlider (screenRect : Rect, rgb : Color) : Color {
    rgb.r = GUI.HorizontalSlider (screenRect, rgb.r, 0.0, 1.0);
    screenRect.y += 20; // <- Move the next control down a bit to avoid overlapping
    rgb.g = GUI.HorizontalSlider (screenRect, rgb.g, 0.0, 1.0);
    screenRect.y += 20; // <- Move the next control down a bit to avoid overlapping
    rgb.b = GUI.HorizontalSlider (screenRect, rgb.b, 0.0, 1.0);
    return rgb;
}


// C#
using UnityEngine;
using System.Collections;

public class GUITest : MonoBehaviour {

    public Color myColor;

    void OnGUI () {
        myColor = RGBSlider (new Rect (10,10,200,10), myColor);
    }

    Color RGBSlider (Rect screenRect, Color rgb) {
        rgb.r = GUI.HorizontalSlider (screenRect, rgb.r, 0.0f, 1.0f);

        // <- Move the next control down a bit to avoid overlapping
        screenRect.y += 20;
        rgb.g = GUI.HorizontalSlider (screenRect, rgb.g, 0.0f, 1.0f);

        // <- Move the next control down a bit to avoid overlapping
        screenRect.y += 20;

        rgb.b = GUI.HorizontalSlider (screenRect, rgb.b, 0.0f, 1.0f);
        return rgb;
    }
}

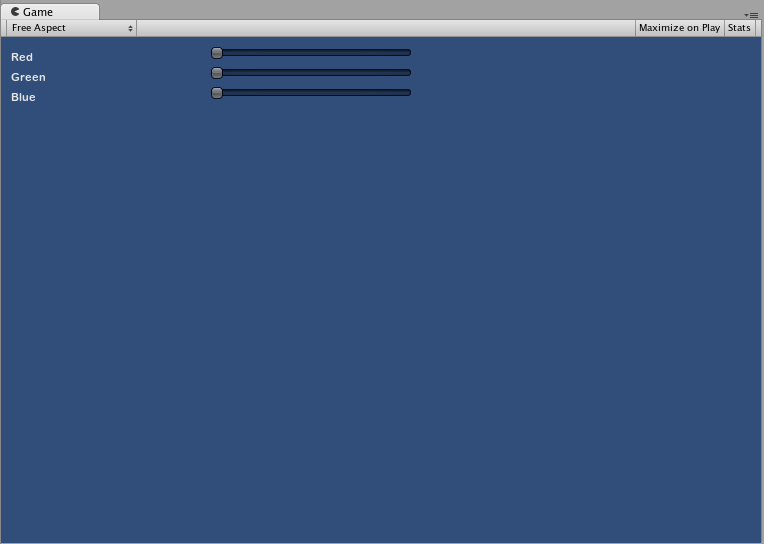
Теперь давайте наложим составные элементы управления друг на друга, чтобы продемонстрировать, как составные элементы управления можно использовать в других составных элементах управления. Для этого мы создадим новый ползунок RGB, как показано выше, но для этого мы будем использовать LabelSlider. Таким образом, у нас всегда будет метка, сообщающая нам, какой ползунок соответствует какому цвету.
/* RGB Label Slider Compound Control */

// JavaScript
var myColor : Color;

function OnGUI () {
    myColor = RGBLabelSlider (Rect (10,10,200,20), myColor);
}

function RGBLabelSlider (screenRect : Rect, rgb : Color) : Color {
    rgb.r = CompoundControls.LabelSlider (screenRect, rgb.r, 1.0, "Red");
    screenRect.y += 20; // <- Move the next control down a bit to avoid overlapping
    rgb.g = CompoundControls.LabelSlider (screenRect, rgb.g, 1.0, "Green");
    screenRect.y += 20; // <- Move the next control down a bit to avoid overlapping
    rgb.b = CompoundControls.LabelSlider (screenRect, rgb.b, 1.0, "Blue");
    return rgb;
}


// C#
using UnityEngine;
using System.Collections;

public class GUITest : MonoBehaviour {

    public Color myColor;

    void OnGUI () {
        myColor = RGBSlider (new Rect (10,10,200,30), myColor);
    }

    Color RGBSlider (Rect screenRect, Color rgb) {
        rgb.r = CompoundControls.LabelSlider (screenRect, rgb.r, 1.0f, "Red");

        // <- Move the next control down a bit to avoid overlapping
        screenRect.y += 20;
        rgb.g = CompoundControls.LabelSlider (screenRect, rgb.g, 1.0f, "Green");

        // <- Move the next control down a bit to avoid overlapping
        screenRect.y += 20;

        rgb.b = CompoundControls.LabelSlider (screenRect, rgb.b, 1.0f, "Blue");

        return rgb;
    }

}


